Aircraft Spruce & Specialty Co.


Get a free Bose SoundLink Micro Bluetooth speaker (a $119 USD value) when you purchase an A30 or ProFlight Series 2 aviation headset between April 6 and May 4, 2024.
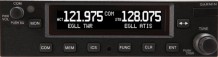
Yaesu's airband radios are professional grade and incorporate their legendary MIL-STD construction and sleek styling. Valid until April 30, 2024
This book is a culmination of over 45 years of experience working on and maintaining all types of Van's RV aircraft. It should be the ultimate reference guide for you or your mechanic to inspect and maintain the aircraft throughout its life
MYGOFLIGHT FLIGHT BAG PLC PRO 2024 EDITION
Made from rugged ballistic nylon, this bag is engineered to fit the lifestyles of aviators and travelers that bring both style and durability.
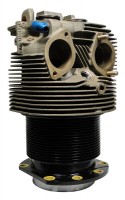
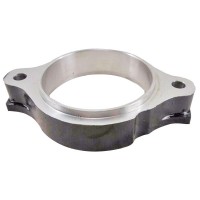
AWI AIRCRAFT EXHAUST SYSTEMS
Aerospace Welding Minneapolis, (AWI) is a world leader in general aviation aircraft exhaust systems and engine mount repair.
New Products


Specials


AEROBREW
COFFEE COMPANY
Take off with Aerobrew Coffee Company! Our unique air roasting method ensures the freshest and most flavorful cup of aviation coffee you'll ever have.
Shop Now

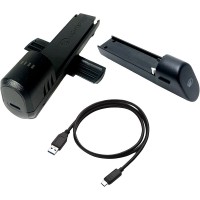
skySensor isn't just the aesthetic match for your right wingtip, it also includes a dual-band ADS-B receiver, static pressure sensor, and internal GPS. Easily receive traffic and weather via WiFi to GDL90 compatible EFB applications.

The FunnelCap makes it safe and easy to service aircraft oil and hydraulic systems without spilling of oil and without getting FOD in the oil, oil can or bottle.
About Us
Aircraft Spruce & Specialty Co. has been the supplier that aircraft builders, owners, pilots, and aviation businesses have depended on since 1965. We carry a wide selection of aircraft parts, building materials, avionics, and pilot supplies all of which are offered here on our website and in the famous Aircraft Spruce catalog. You can depend on Aircraft Spruce for prompt shipping and competitive pricing on all orders.
Aircraft Spruce supplies components for a wide variety of homebuilt aircraft including the Lancair, Vans Aircraft, and Cozy, as well as factory built parts for Cessna, Piper, Beech, and Mooney. Products include: Garmin avionics, tools, charts, propellers, spruce, software, instruments, aircraft engines and parts, aviation headsets, landing gear components, and aircraft batteries. We also carry a full line of aviation grade hardware, covering supplies, composite materials, airframe parts, electrical components, and steel and aluminum. For airplane parts and pilot supplies, Aircraft Spruce is the leading aviation supply house in the world. Shop with Aircraft Spruce for all your aviation needs!
Learn more about us Orders By 4pm Ship Same Day by UPS
 Free Shipping on Orders over $350
 Industry Leader Since 1965
 Lowest Price Policy
-
 AeroLEDs - LED Lighting
AeroLEDs designs and produces high-quality LED aircraft lighting including landing, navigation & replacement bulbs.
Shop Now -
 Sky-Tec Starters
Sky-Tec offers lightweight, high-torque starters that are leading the aircraft industry for Lycoming, Continental, Franklin and Rotax engines.
Shop Now -
 PLANELOGIX Digital Maintenance Tracking
Easily track and reorder maintenance items with the easy to use interface.
Click Here
Shop by Category


Affiliated with